Last week was my mother and eldest sisters birthdays, because both of them love hot drinks I decided to make them reusable cup sleeves and for my mom (the tea drinker) a tea wallet.
The tutorials that I used are linked here
Cup Sleeve and
Tea Wallet
But as stated before, I don't follow tutorials. I'm inspired by them :)

So I started off with creating my pattern.
I used a paper sleeve and added 1/2in seam around the outside.
Next was cutting out my fabric. I have been saving these flower patterned fabric for my sister for years, and finally I USED THEM!!
The fabric is thick so I opted to not use a interfacing.
My mom said that while it was nice to feel the warmth from the drink, I should probably use an interfacing next time.
So if I make these again, I'd make them with two options. "Feel the warmth" and "Be protected" (patten pending j/k)

After cutting the fabric you place the right sides together (pin) and add the elastic bit folded and placed inside the two pieces (see right).
I liked starting on the opposite end from the elastic piece at a corner. Sew towards the elastic band, and finish at the corner next to where I started. This left a small hole for my to pull the fabric through (using the elastic loop). Shown to the left.
I finished by ironing the sleeve flat with attention to the hole. Once the seam was ironed flat, I sewed around the outside edge to keep the project all together.
The button I placed 2 1/2in - 3in from the outer edge on the front.
Of course most of the fun is selecting the best button
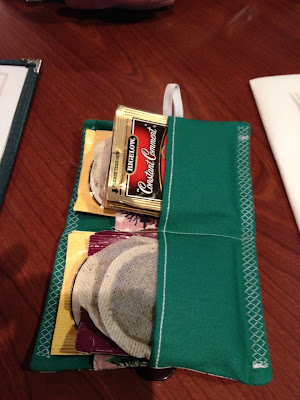
My Tea Wallet project, of course I forgot to take many pictures.

First I cut the fabric, three squares 5x8 and one 4x8 (I didn't have enough fabric to follow the directions to a T)
I ironed the two pocket pieces with a 1/4in seam. Sewed it before placing it on the green inner fabric (see the
tutorial for what I did next)
I think it turned out fabulously :)
 |
| Finished product |
 |
| My mom putting it to good use |
 |
| Birthday Girls! |
 |
| I added a applique flower to the flower sleeves. There just weren't enough flowers |

 |
| You can see the added flower better here (one the brown one) |
 |
Of course I had to make myself one too (on the right)
It was fun adding stitches from my new machine (see it on the edges?) |


